Cepcor Invests in Precision with LK Metrology’s New Coordinate Measuring Machine

CMS Cepcor, founded in 1989 and headquartered in Coalville, Leicestershire, is a leading supplier of aftermarket crusher spares, manganese-steel wear liners, and other equipment to the mining, aggregate production, and associated industries worldwide. In February this year (2024), the company took delivery of its first coordinate measuring machine (CMM), greatly enhancing quality control of the products it manufactures or refurbishes to tight tolerances. Having a nominal inspection volume of 3,000 x 1,500 x 1,000 mm, the CMM is an Altera M built by UK firm LK Metrology at its factory in Castle Donington, Derbyshire.
Previously, CMS Cepcor had been using a pair of manually-operated, portable, 6-axis arms with a 2.5-meter and a 3-meter reach, respectively, to check cast-iron, cast or forged steel, and bronze components by touch-probing them. This was a lengthy process, as well as being insufficiently precise to measure some parts without difficulty. For example, it was challenging to inspect bearing seats whose tolerances are from 50 down to 30 microns total, shafts up to half a meter in diameter, which need to be accurate to within 30 to 20 microns, and various features on housings that can be tied up to half that tolerance. Consequently, there was a need to use micrometers and other traditional manual gages to measure those dimensions, which was even more time-consuming and subject to inconsistencies depending on which operator had been allocated the job. Additionally, some parts up to 400 mm in diameter by 700 mm long have eccentric tapers with drawing tolerances down to as little as 15 arcseconds, which were problematic to check by hand.
A further difficulty was that sometimes an arm would be set up on a metrology fixture table, and in the process of measuring multiple items, such as head nuts or locking bolts produced in batches of up to 50, an urgent request would be made by shop floor staff for the arm to be transferred to a machine tool to evaluate the dimensions of a part in situ before it is removed from the machine. That meant immediately relocating the arm, performing the new measurements, returning the arm to the table, and most probably starting the original cycle again. With the CMM in place and the arms now more or less dedicated to in-process metrology, as well as less stringent inspection tasks, such wasted time is a thing of the past.
| “The LK CMM has a maximum permissible first-term error of less than two microns, so it is able to measure even very large parts exactly and repeatedly. It is at least an order of magnitude more precise than a portable arm, giving us—and more importantly, our customers—extra confidence in the results,” commented Les Hickens, Quality Manager, CMS Cepcor. “The high level of accuracy is particularly useful when we and a customer are discussing the dimensions of a lead-bronze bushing, for example, a material that has a high coefficient of expansion. In such cases, both close-tolerance inspection and careful temperature management are important when reconciling our respective measurements.” |
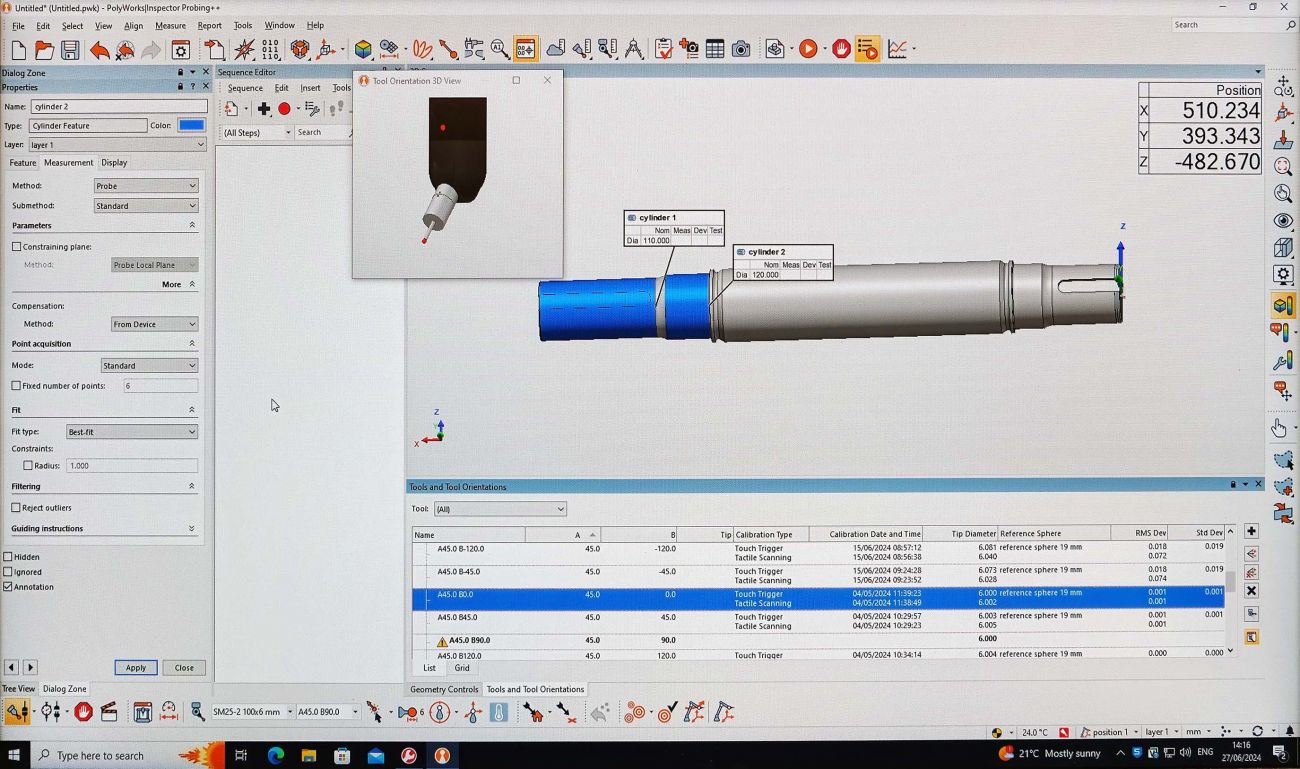
PolyWorks® Inspector software is used across all metrology platforms at CMS Cepcor - the LK CMM, two portable measuring arms and a robot-mounted optical scanner. |
He continued, “Our Altera M has thermal compensation, with a sensor built into each axis and a temperature probe supplied for attaching to the component under investigation. It would not be practical to wait 24 hours while a large, heavy casting normalizes its temperature with that of the CMM.”
Hickens revealed that before investing in the CMM, machines from two other potential suppliers were considered. LK was chosen on the basis of the good build quality of the Altera M, the stable ceramic bridge and spindle, and the competitive price, as well as the proximity of the manufacturer’s factory for providing backup and service.
Many parts undergoing quality control are rotational, initially turned on a Doosan lathe and then milled and drilled in a second operation on an Honor Seiki vertical boring mill or a Norma machining center. Consequently, it was considered expedient for LK to supply the Altera M 30.15.10 with a Renishaw PH10MQ PLUS motorized indexing head and an SP25M probe for analog contact scanning, capable of measuring up to 1,000 points per second. The system is able to verify any out-of-roundness much faster than if a touch probe is used to capture a succession of discrete points, and the resulting reports are more robust due to the large amount of data captured by continuous scanning.
Innovmetric’s PolyWorks Inspector software was also supplied with the CMM. It is a facet of the installation that has delighted the CMS Cepcor metrology team, as it is simple to learn and use and makes training new operators easy. The same software is being retrofitted to the portable measuring arms, as well as a handheld optical scanner on-site employed for checking very large castings, so only one seat of PolyWorks is needed, saving expense. The commonality of the software across the different platforms allows considerable versatility for merging, for instance, in-process measurements with an arm on a machine tool with a final inspection of the same part on the CMM.
“At CMS Cepcor, we are committed to excellence, and our investment in the Altera M reflects that. Although we have been using the CMM for only a few months, it has resulted in a step-change in our metrology capability, and the benefits are already tangible. Like a CNC machine tool, once set up and programmed, the CMM executes inspection programs automatically, allowing operators to focus on other tasks around the factory, which translates into an overall productivity improvement,” concluded Hickens. “The heightened precision ensures that the components we supply are controlled carefully to the relevant specifications, making sure we consistently meet our rigorous quality standards. Moreover, by strengthening our inspection capabilities, we are able to foster greater confidence in our customers and suppliers, thereby improving our partnerships and reputation.”
Image Source: LK Metrology


 Facebook
.png) Twitter
Twitter Linkedin
 Subscribe