API Introduced DYNAMIC 9D LADAR at Control 2022
Rockville, US – Automated Precision, Inc (API) introduced the DYNAMIC 9D LADAR, an innovative Laser Detection and Ranging system that captures both dimensional and surface geometry data, at Control 2022. It incorporates ground-breaking technology that is set to transform automated production measurements. The patent-pending Dynamic 9D LADAR is the world’s first interferometry-based LADAR system that incorporates Optical Frequency Chirping Interferometry (OFCI) technology. The accurate data collection of production measurements provided by 9D LADAR represents the next generation dimensional inspection solution. 9D LADAR captures the geometry data targeted at automotive, aerospace, and transportation manufacturing industries.
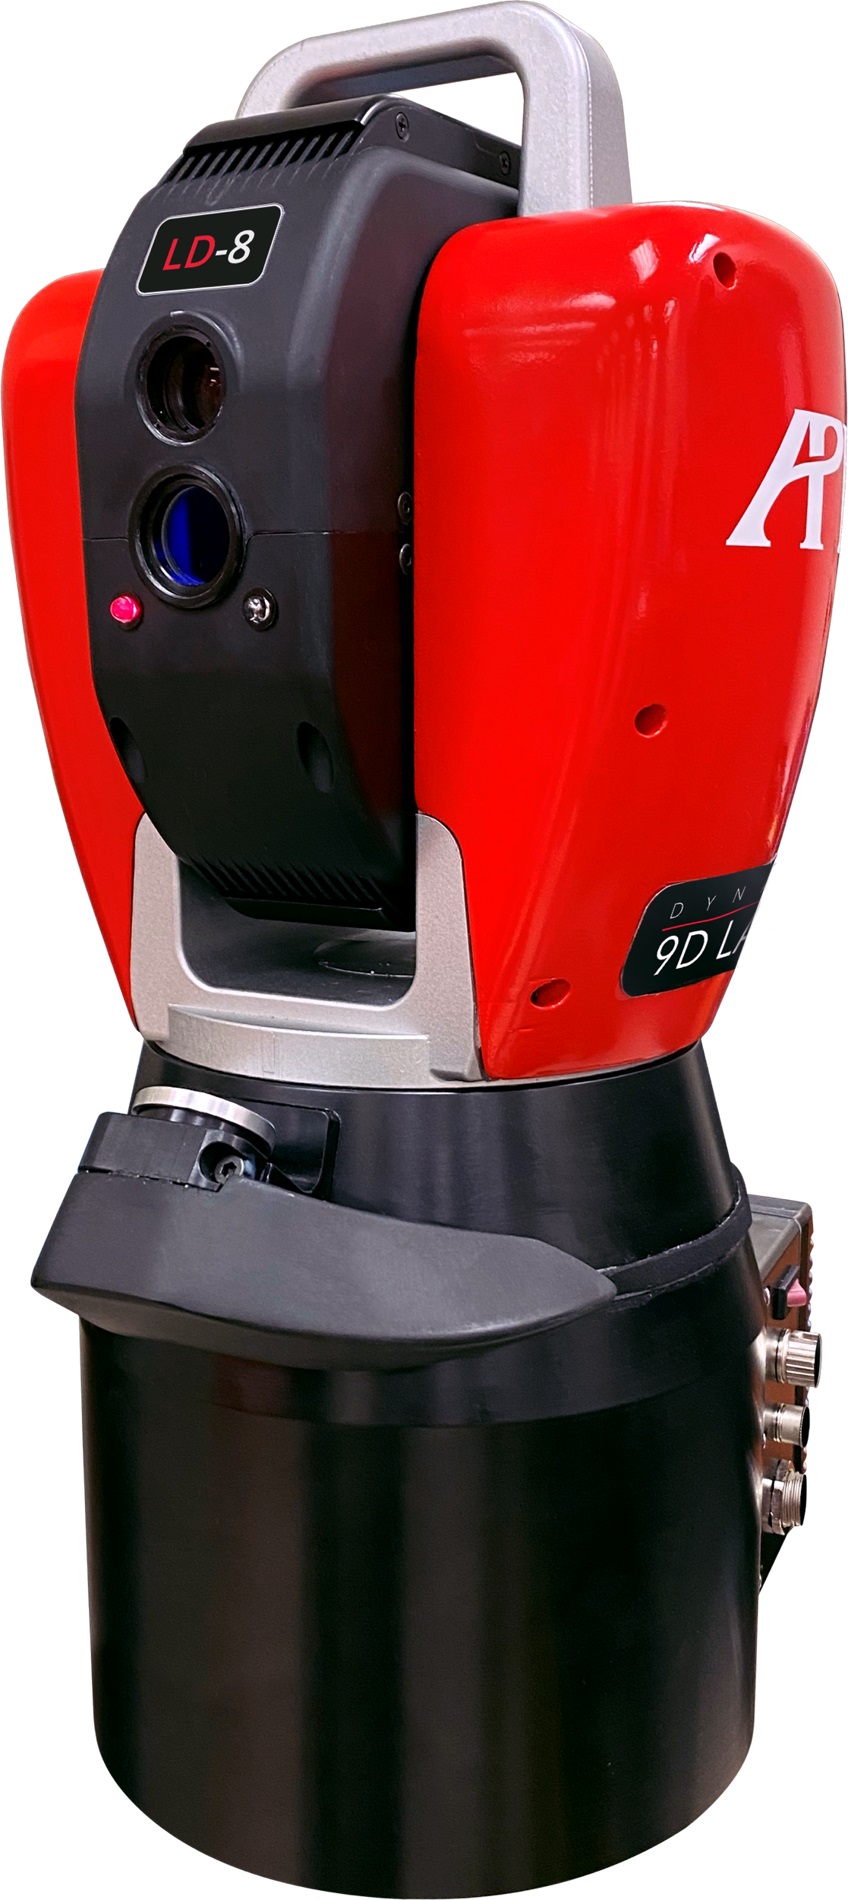
Using both optical laser-line and structured light scanning sensors, Dynamic 9D LADAR replaces traditional, off-line, large volume coordinate measuring machines (CMM) and near-line and in-line inspection solutions. The two-axis 9D LADAR systems process measured data at a rate of 20,000 points per second and scan speeds of 0.2seconds/cm2. Furthermore, the 9D LADAR’s high Dynamic range is insensitive to target reflectivity, can measure translucent materials, and can measure target features with an incidence angle of up to 85 degrees. With 0.1mm line spacing, high-density raster scanning can deliver up to 50 lines per second. The on-board scale reference system of the 9D LADAR delivers unparalleled 2D and 3D accuracies of just 6µm/m, comparable to benchmark accuracy large volume CMMs.
|
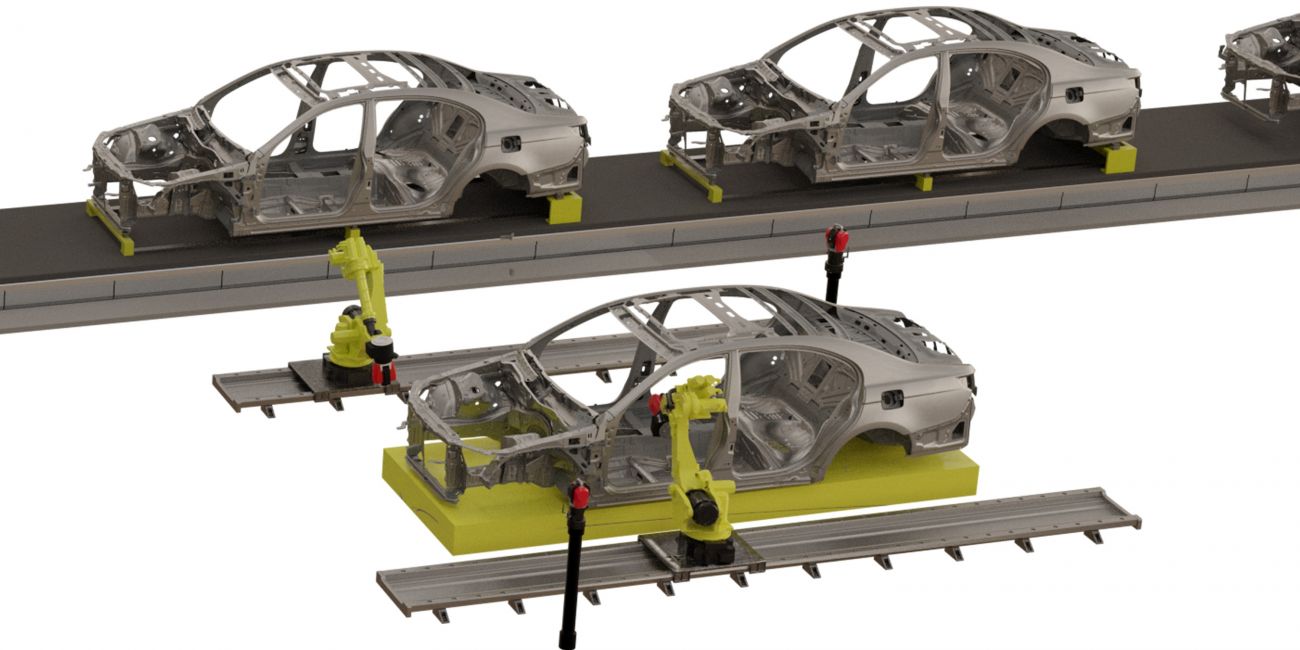
Automated near-line inspections with 9D LADAR |
The compact design of the Dynamic 9D LADAR, weighing only 10.4kg, incorporates an integral controller with ethernet communication, allowing for seamless integration to both portal CMM frames or 6-axis industrial robots, including 7-axis rail mounted configurations. The iVision smart camera system from 9D LADAR provides instant part visualization for automated scan path planning, as well as automated feature and targeted region measurement, as well as remote measurement operation viability. 9D LADAR has a laser beam spot-size of 32µm and is available in three model variants depending on the required application measuring range: LD-8: 0.5m-8m range, LD-15: 1m-15m range, and LD-25: 1.5m-25m range.
To achieve reasonable accuracy, previous Laser Radar technology required large sample averaging, effectively slowing data acquisition rates. In production environments, this made both accuracy and performance highly dependent on surface reflectivity, incident angle, and background noise. The company’s new LADAR technology uses 20kHz laser chirping to generate a wide spectrum for optical interference, allowing the target distance to be detected accurately with 100x greater sensitivity. This eliminates previous issues associated with surface reflectivity, slow speeds, limited accuracies, restrictive incident angles, and noise susceptibility, rendering traditional Laser Radar systems obsolete.
Dynamic 9D LADAR delivers X, Y, Z, I, J, K data for each generated cloud point, as well as R, G, B data, which allows scanned data to be imaged directly onto the captured camera image. This one-of-a-kind capability enables the display of characteristics such as distinct background color contrast, surface vectors, surface roughness, and so on, which are difficult to isolate using standard 3D point cloud data.
DELIVERING QUALITY 4.0 APPLICATIONS
Automated Portable Measurements
The compact size and light weight design of 9D LADAR allows the instrument to be taken directly to manufacturing locations, allowing automated measurement to be performed quickly and with minimum set-up times. The execution of all measurements automatically eliminates measurement variability using current manually operated tactile and optical measuring devices.
Automated CMM Measurements
The CMM remains a workhorse of manufacturing organizations due to its benchmark accuracies, but it is typically isolated away from the manufacturing floor due to slow measurement speed. Dynamic 9D LADAR can be seamlessly integrated with a large-volume gantry or bridge style CMM, providing a high-speed optical measurement solution that eliminates complex CMM programming and decreases CMM measurement cycles times 10-fold.
Robotic Automated Measurements
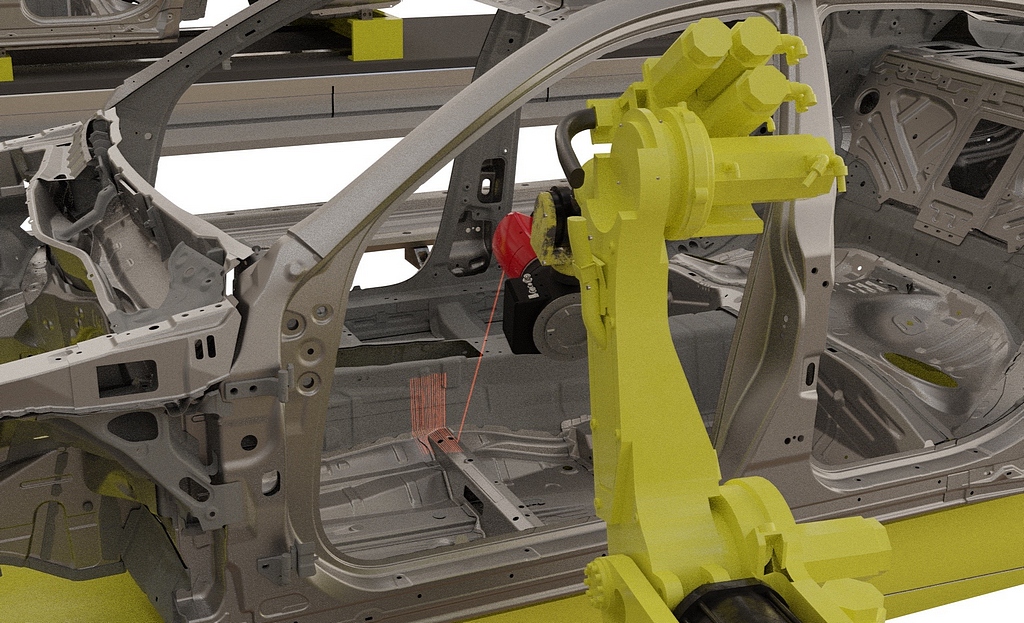
Non-contact Laser Radar technology has already proven its ability to measure automotive parts including full ‘Body-in-White’, making it ideal for fully-automated, CMM-style measurements adjacent to production lines. The precision automated high-speed ‘raster’ scanning of 9D LADAR collects both surface geometry point cloud data and 'gap and flush' dimensional data. The enhanced speed and data collection rate of 9D LADAR significantly increases the possibility of pacing production. In-line or near-line systems can be installed.
The company provides dynamic tracking of robot positioning through the use of its 6DoF RADIAN Laser Tracker, which provides accurate real-time robot positioning. The new API Dynamic 9D LADAR significantly boosts measurement throughput and productivity in all automotive applications.
|
Automated near-line inspections with 9D LADAR |
Multi-LADAR - In-Line BIW Inspection
The high scanning speed and versatility of 9D LADAR allows an in-line inspection paradigm shift by providing a fully programmable measurement solution to be installed, delivering both complete individual car body inspection, including critical gap and flush measurements, as well as overall process control data delivering Quality 4.0 adaptive control of operations. The company offers dynamic tracking of robot positioning through the use of its 6DoF RADIAN Laser Tracker, which provides accurate real-time robot positioning.
TRUE COLOR DIGITAL TWIN
9D LADAR’s measurement scanning path is generated automatically within API’s MeasurePro software, which also captures the generated point cloud data in real-time with dynamic on-screen representation. Geometrical analysis of features and surfaces from point-cloud data can be done directly in MeasurePro or in all major third-party softwares, along with the creation of a digital twin of the measured part by direct comparison with nominal part CAD data.
The unique RGB data contained within the generated point cloud enables a full color representation of the scanned part with associated fidelity, highlighting surface discrepancies, and replicating the authentic color of the physical part.
Image Source: Automated Precision, Inc


 Facebook
.png) Twitter
Twitter Linkedin
 Subscribe